Sunday, June 15, 2014

Recipe: Cauliflower and Carrot Puree

I know it's been a long time since my last post - but I've admittedly been traveling so much I just haven't been able to take the time to get back into my cooking. This is a very simple recipe that I've made many times before, but this is the first time I've ever written it down. This is best as a side dish with other simple comforts like grilled chicken or fish.

Cauliflower and Carrot Puree


Ingredients


1 large head of cauliflower, pulled apart into coarse florets
6 large carrots, cut into 1/2 inch chunks
1/2 large sweet onion, cut into chunks
2 cups of chicken broth
2 cups of water
6 tbsp unsalted butter
2 tsp kosher salt
1 tbsp black pepper

Directions


Place all the vegetables, chicken broth, and water into a large 6 quart saucepan. Bring heat to high and heat until boiling. Reduce heat to low, cover, and simmer for 45 minutes to 1 hour until the vegetables are all fully tender. Remove from heat. Using an immersion blender, blend until smooth. Add butter, salt, and black pepper. Return to low heat and cook, stirring frequently, another 10 minutes until butter is thoroughly incorporated and mixture begins to thicken. Remove from heat and let cool for 10 minutes then serve.

Makes 6 - 8 side dish servings.

Monday, April 21, 2014

Recipe: Buttermilk Cornmeal Pancakes ("Hoe Cakes")

I remember eating these often at my grandmothers' and great grandmothers' houses growing up - each time they'd never be made exactly the same, which admittedly was kinda the fun in it ;) Honey was the common accompaniment, usually fresh honey given to us by beekeepers in the family living nearby. As I got older, maple syrup or molasses would show up as an option, but I usually stuck with honey. And butter - at least a little bit :). They were usually topped with fresh sliced peaches or blueberries or blackberries from grandma's yard if served in the morning - they'd be a little less sweet and be served plain if in the evening. The version below is definitely slightly sweet. However, I don't have much of a sweet tooth, so I've reduced the sweetness down to a level I consider somewhere in between the "morning" and the "afternoon" version. I also remember cornstarch being used to add density - but I'm leaving that to the rice flour in my version (you can go with an almond or other nut flour instead of rice flour, just be prepared for a "nuttier" taste).

Buttermilk Cornmeal Pancakes ("Hoe Cakes")


Ingredients


2 cups of buttermilk
4 tbsp. of unsalted butter, melted
1 1/2 cups of cornmeal
2/3 cup of rice flour
1 1/3 tablespoons of sugar
2 teaspoons of baking powder
1/2 teaspoon of baking soda
1 teaspoon of salt
1/2 teaspoon of nutmeg
1/2 teaspoon of allspice
1 teaspoon of vanilla extract
2 large eggs, beaten
Vegetable oil cooking spray (for the griddle)

Directions


Whisk together all dry ingredients in one bowl and whisk all wet ingredients together in another bowl thoroughly. Pour the wet ingredients into the dry ingredients and whisk thoroughly until all dry ingredients are thoroughly combined into the batter. Let the batter sit in the bowl for approximately 15 minutes (this will lead to fluffier cakes).

Spray non-stick griddle or large skillet with cooking spray. Heat griddle over medium heat. Whisk the batter one last time to re-combine after resting. Once griddle is hot and slightly smoking, use a 1/3 cup measure and pour out 2 cakes into the skillet. Cook for 2 minutes on the first side, carefully flip and cook 2 minutes on the other side. Place onto a wire rack while cooking the remainder of the cakes. Top with fresh fruit, sifted confectioner's sugar, honey, molasses, or syrup of your choosing.

Makes approximately 12 - 14 cakes.

Tuesday, April 15, 2014

Recipe: Miso Glazed Black Cod over Soba Noodles

I've honestly had so many different versions of this dish because it is one of my favorites in Japanese cooking. I've made some modifications to make it easier for we American cooks to recreate the dish. I also add a spicy note to mine that is not typical in most Japanese versions. Also, the citrus is not common either - but I think it just adds excellent flavor to what is a relatively oily and fatty fish. "Black Cod" is the American name for the sablefish and it is very common and accessible here on the West Coast. On the East Coast, sea bass is likely more accessible and can be used. However, regular varieties of "cod" should not be used here - they won't be able to stand up to the marinating and glaze process. Some recipes go from marinade right to cooking - others from glaze to cooking. Personally, I find the combined process produces the most intense flavor and goes best with the heartier soba noodles.

Miso Glazed Black Cod over Soba Noodles


Ingredients


Marinade


2 cups of water
1 cup of dashi stock
3/4 cup of soy sauce
1/2 cup of brown sugar
1/3 cup fish sauce
8 small thai chiles, minced

Glaze


1 cup freshly squeezed orange juice
3/4 cup red miso paste
2/3 cup sake
2/3 cup mirin
1/2 cup water
1/4 cup of sugar
2 teaspoons rice vinegar
1 teaspoon of orange zest
1 teaspoon wasabi paste
1 teaspoon minced ginger
1 teaspoon minced garlic
1 teaspoon corn starch

Main


2 lbs. of sablefish (black cod) filets
16 oz. of cooked soba noodles
2 cups of chopped bok choy, steamed
2 cups dashi stock
2 tbsp. black sesame seeds
2 teaspoons togarashi powder 

Directions


Whisk marinade ingredients together in a large bowl. Place fish filets into the marinade, cover, and marinade at least 8 hours to overnight.

Preheat oven to 400 degrees. Whisk all ingredients of the glaze together in a saucepan and heat over medium-high heat to a simmer. Reduce heat to medium, and continue cooking until the glaze mixture reduces to about 1 1/2 cups and easily coats the back of a spoon, approximately 20 minutes. Remove from heat and set aside.

Remove fish from marinade onto paper towels and pat dry thoroughly. Heat an oiled outdoor grill or stovetop grill pan to medium high heat. Coat filets thoroughly in the reserved glaze. Place on the grill for 2 - 3 minutes on each side to sear. Transfer to a casserole dish and baste each piece in the remainder of the glaze. Bake an additional 10 - 12 minutes until fish is cooked through, turning over halfway through cooking time.

Place equal amounts of soba noodles, bok choy, dashi stock, sesame seeds, and togarashi powder into large bowls and toss to mix. Place a fish filet on top of each bowl. Serve immediately.

Makes 4 servings.

Tuesday, April 8, 2014

Recipe: Agedashi Tofu

This is simple Japanese comfort food. The tofu stays soft and silky on the inside while the outside gets a nice coating that holds up to the very flavorful broth. This is one of my favorite Japanese recipes and my version is replicated from memories of very good versions I’ve had in Japan and elsewhere. The garnishes are very important to the overall flavor of this dish - so don’t leave them out! Normally served as an appetizer in Japanese restaurants, this can also be a main course by increasing the portion size or part of a light lunch with a few pieces of fresh sashimi or small portion of cooked fish.


Agedashi Tofu


Ingredients


Sauce

1 lb. (16 oz.) of soft tofu
1 1/2 cup of dashi stock
1/4 cup mirin
1/4 cup soy sauce
1/4 cup of water
1 tbsp rice vinegar

Tofu

1 egg
1 cup rice flour
3 - 4 cups of rice bran oil or vegetable oil (for frying)

Garnish

1/2 cup diced scallions
2 tbsp katsuobushi (bonito flakes)
1 1/2 tbsp grated daikon radish
1 4” square sheet of nori (dried seaweed) cut into thin strips
1 tsp togarashi powder (Japanese hot pepper powder) or crushed red pepper


Directions


Wrap tofu in two dishcloths. Place a heavy weight on top of the tofu (like a cast iron skillet) and leave to drain for approximately 30 minutes. Cut tofu into 1 1/2 inch cubes.

Beat the 1 egg thoroughly in one bowl. Place the rice flour in another bowl. Heat the oil over high heat until the oil temperature reaches 350 degrees. Coat each piece of tofu thoroughly in the rice flour, then coat in egg allowing any excess to drip off, then coat again in rice flour. Place immediately into the hot oil and fry until medium brown, turning as necessary. Place on a paper towel lined plate to drain off excess oil when done. 

Whisk dashi stock, mirin, soy sauce, water, and rice vinegar together in a non-reactive (glass/plastic) bowl. Place in microwave and heat for 45 seconds. Whisk again for a few seconds.

Pour equal amounts of the stock mixture into each serving bowl. Evenly divide tofu pieces among the bowls and place on top of the broth. Garnish each bowl with the scallions, bonito flakes, daikon, nori, and shigarashi. Serve immediately.

Makes 4 appetizer servings or 2 light meal servings.

Sunday, April 6, 2014

Recipe: Dashi Stock

This stock is used everywhere in Japanese cuisine. This is my version that I’ve gotten to based on trial and error. Once you get the hang of making this stock, you can adjust the ingredients to fit your own taste.

Dashi Stock


Ingredients


3/4 cup of konbu (dried kelp) cut into 1 1/2 inch pieces
2/3 cup of enoki mushrooms, kept whole but packed to get a full 2/3 cup
1/2 cup of dried bonito flakes, packed
2 quarts + 1 cup of water

Directions


Bring water to a boil over high heat. Add all remaining ingredients and reduce to a simmer over low heat. Cover pot and simmer for approximately 1 hour. Drain through a fine mesh strainer, cheesecloth, or coffee filter.

This stock can be kept in the refrigerator for 4 - 5 days, in the freezer indefinitely.

Makes approximately 2 quarts (1/2 gallon) of stock.

Saturday, April 5, 2014

Prep Class: Dashi Stock

Dashi stock is to Japanese cooking as master stock is to Chinese cooking as our unique mirepoix of bell peppers, onions, and celery is to Southern cooking.  While the stock is starting to show up in dishes in restaurants all over the country, it is an essential ingredient to so many Japanese dishes that it's honestly quite impossible to do most Japanese recipes without it. The origins of the stock date back as far as the year 790 A.D. However, exactly how to make it became information trapped in the heads of generations of Japanese men and women who passed the what and how down through their own children as oral history. It wasn't until 1907 that a Japanese chemist, Kikunae Ikeda, embarked on a series of experiments to break down what actually went into the dashi stock of his own wife and mother. This discovery led to recipes finally being written down and became the catalyst for the convenience versions.

The goal of dashi stock is to achieve the critical "umami" flavor of Japanese cuisine - the aroma and taste of "meatiness" in a dish without actually using any meat ingredients. This is achieved through increasing the glutamate content of a dish - and dashi stock is very high in glutamates. While there are various dashi powders, starters, etc. that can be found in Asian markets here and are also popular in Japan, it's so ridiculously easy to make your own dashi stock that I recommend skipping the convenience versions.


Thankfully, the core ingredients for dashi stock have become more readily available in the US due to the rising popularity of Japanese and Japanese-influenced cuisine. The stock at its core contains only three ingredients - dried kelp (konbu), bonito flakes (dried fish skin), and filtered water. Some versions also add enoki, maitake, or shiitake mushrooms to further increase the umami element.

My next post will give you my version of dashi stock. I will then follow up with my versions of two popular Japanese recipes that require the stock.

Monday, March 31, 2014

Recipe: Brunswick Stew

I admittedly only make this recipe a few times a year because it requires the aforementioned pulled pork to make it work - something that I don't take the opportunity to make very often. Technically, you could do this recipe with an equivalent amount of pulled chicken - about the amount of chicken you'd get from 2 BBQ'ed or rotisserie whole birds. Very often in the south such substitutions are made when someone gets a hankerin' for this recipe yet doesn't have the necessary pulled pork on hand - it's just how we roll in true southern cooking :) The recipe has its origins with one of the deacons and close family friends at the Baptist church I grew up attending in the small town of Lizella, Georgia. I've taken the roots of the recipe my mother could remember and combined those up with modifications I've made over the years (mostly due to ingredients on hand being very different in California) to land on this particular recipe. I've got a few more vegetables in mine because, well, I like the vegetables. However, feel free to make whatever substitutions or additions you'd like in that department - in general, I end up putting whatever I have on hand in the freezer or canned in the pantry in it.

Brunswick Stew

Ingredients


Main


1 16 oz. can or frozen package of butter beans
1 16 oz. can or frozen package of sweet corn kernels
1 16 oz. can or frozen package of sweet peas
1 16 oz. can or frozen package of cut green beans
1 16 oz. frozen package of chopped collard, mustard, or other bitter greens
1 28 oz. can of crushed tomatoes

Stew Broth


5 cups water
4 cups low salt chicken broth
1 large Vidalia or other sweet onion, diced (about 2 cups)
1 stalk of celery, stems removed, diced (about 2 cups)
2 large carrots, diced (about 2 cups)
1 red bell pepper, diced
1 green bell pepper, diced
2 cups ketchup
1 cup Djion mustard
1/2 c. dry white wine (Sauvignon Blanc or similar)
1/2 c. apple cider vinegar
5 tbsp. minced garlic (approx. 15 cloves)
2 tbsp. Worcestershire sauce
2 tsp. liquid smoke
1 tbsp onion powder
1 tbsp ground black pepper
1/2 tbsp ground white pepper
2 tsp cracked red pepper
2 tsp paprika
1 tsp chili powder
2/3 cup brown sugar

Directions


Put all of the ingredients for the stew broth together in a large stock pot. Bring to a boil and then reduce to a low simmer. Cover and simmer for 30 - 40 minutes to allow flavors to combine, stirring occasionally. 

Add pulled pork. Bring back to a simmer and simmer an additional 20 - 30 minutes, stirring occasionally. Finally, add all remaining frozen/canned vegetables. Bring back to a low simmer and cook for an additional 30 minutes. Because of the number and amount of ingredients, the final consistency should be that of a thick, hearty stew. If not thick enough to your liking, use a corn starch slurry (2 tsp corn starch whisked into 2 tbsp of water) to thicken up, adding additional slurry every 5 minutes or so to get to desired consistency. I do not recommend using a roux as a thickener for this stew given the amount of retained fat from the pulled pork. 

Makes enough servings to feed a small army :).

Sunday, March 23, 2014

Prep Class & Recipe: Oven-roasted Pulled Pork

You honestly cannot make Brunswick Stew without a good pulled pork - it's at the core of the recipe. However, versions have been made that use pulled chicken or slow cooked shredded beef brisket - feel free to substitute those if pork is just not your thing. Because of the weather here in San Francisco, I don't get to fire up the grill with my smoker unit as often as I'd like, so I've come up with a version of pulled pork that can be done more easily in the oven. Unfortunately, the process is still a 2 day affair, but the advantage of the oven version is that almost all of that time is unattended. This can be made ahead of time and refrigerated for up to 3 days before being used to make my stew recipe.

Oven-Roasted Pulled Pork


Ingredients


7 - 9 lb. boneless pork butt (butchers often call it "Boston Butt")

Brine

1 gallon of water
1 cup of soy sauce
1 cup of sugar
1/2 cup of Kosher salt
1/4 cup of hot sauce

Rub

2 tsp of liquid smoke
1 tbsp of Worcestershire sauce
1 tbsp Kosher salt
1 tbsp ground black pepper
1/2 tbsp cayenne pepper
1/2 tbsp ground white pepper
1 tbsp ground cumin
1 tbsp garlic powder
1 tbsp onion powder
1 tbsp paprika
1 tbsp ground mustard
2 tbsp brown sugar

Directions


Whisk together the brine ingredients until sugar and salt are fully dissolved. Using a fork, poke many deep holes all over the meat. Place the meat into the brine and cover. Refrigerate overnight.

Preheat oven to 275 degrees. Remove meat from the brine and pat as dry as possible with paper towels. Rub liquid smoke and Worcestershire sauce into the meat until it is well absorbed. Mix all dry spices together thoroughly. Coat the meat completely with all of the spices ensuring all adhere to the meat. Place the meat into a deep roasting pan and place into the oven. You will need to cook approximately 1 hour per pound of meat. Every two hours, use a spoon to take the juices that have collected in the pan and pour them over the meat. Cook the meat until it reaches an internal temperature of approximately 185 degrees. Remove from oven at that point, cover with foil, and rest for an hour.

Once rested, use two forks to pull meat apart into shreds in the roasting pan, allowing the meat to soak up the juices in the pan. You can serve immediately with your favorite BBQ sauce. Or, save it for my Brunswick Stew recipe coming soon.

Wednesday, March 19, 2014

Recipe: Vietnamese Chicken Salad (Goi Ga)

This is one of my favorite salads. I've both had and made many different variations on this and this is the one I've landed on as my favorite version to make. As with many recipes, I have to go by memory from restaurant versions and then spend a little effort to eventually perfect my own version.

Vietnamese Chicken Salad (Goi Ga)


Ingredients


Chicken

1 lb. boneless, skinless chicken breasts - butterflied and pounded to 1/3" thick, cut into 4 filets
3 cups of water
1/2 cup soy sauce
1/4 cup fish sauce
1/4 cup sriracha
3 tbsp sugar

Salad

1 pound of shredded red and green cabbage
1 cup of carrots, julienned
1 large cucumber, thin sliced
6 Thai chiles, chopped
1 large orange or yellow bell pepper, diced
1 large handful of fresh mint, chopped
1 large handful of fresh basil, chopped
1 large handful of fresh cilantro, chopped
1 bunch of scallions, chopped
3 slices of thick slab bacon, diced
2/3 cup of minced shallot
1/2 cup crushed peanuts

Dressing

2 tbsp minced garlic
2 tbsp minced ginger
2 Thai chiles, minced
2/3 cup fish sauce
1/3 cup water
1 tbsp soy sauce
1 tbsp sesame oil
1 tbsp sugar
1 tbsp rice vinegar

Directions


Whisk together the water, soy sauce, fish sauce, sriracha, and sugar for the chicken in a medium bowl. Place chicken in the marinate, cover, and place in the refrigerator for at least 2 hours up to 6 hours.

Remove chicken from marinade and pat as dry as possible with paper towels. Heat grill pan or outdoor grill to medium high heat and oil the grates well. Cook chicken for about 4 - 5 minutes on each side until internal temperature reaches 160 degrees. Place chicken on a plate and cover for 5 minutes. Remove cover and allow chicken to cool for an additional 10 minutes. Using a sharp knife and fork, shred the chicken into thin strips.

Cook diced bacon in a non-stick skillet over medium heat until browned. Remove pieces and allow to drain on paper towels. Leave bacon drippings in the skillet and add minced shallot and cook until medium brown and the shallot starts to become crispy. Remove shallot and place on paper towels to drain.

Whisk together all dressing ingredients thoroughly until sugar is fully incorporated. Mix together all salad components including drained and cooled bacon and fried shallots. Pour dressing over salad and toss together liberally. Add chicken and toss again to incorporate. Serve immediately.

Makes 6 servings.

Monday, March 17, 2014

Recipe: Scalloped Tomatoes

I first discovered what became this recipe at the historic Mary Mac's Tea Room in Atlanta about 10 years ago. At Mary Mac's, it is called "tomato pie." As I became more exploratory with food from all over the south around the same time, I picked up a copy of one of the first cookbooks I ever owned: the classic from the queen of southern cooking herself, Ms. Edna Lewis - The Taste of Country Cooking. In this cookbook, Ms. Lewis called her version "scalloped tomatoes," opining that the technique and style originated in French cooking and was brought to the US via French Creole settlers. I began with her classic recipe and have made many different versions - including one more like the "tomato pie" at Mary Mac's. I've now settled in with this version which has a more French country/Provençal flavor profile. The key is to use heirloom tomatoes, especially ones of varying colors that give this dish its rich tomato flavor profile. Unfortunately I know heirlooms are only in season in most places for about half of the year. It is possible to use good quality on-the-vine tomatoes in the recipe, just realize it won't come out quite the same. I've also added a West Coast twist by using a San Francisco sourdough baguette. However, any freshly made French baguette will work.

Scalloped Tomatoes


Ingredients


6 - 8 large heirloom tomatoes
1 large sweet onion, diced
1 large sourdough baguette, cut into 1 inch cubes
2 tbsp. of olive oil
8 oz. of thick, uncured slab bacon, diced
4 tbsp. of butter (1/2 stick)
2 tbsp. of minced garlic
1 tsp. of black pepper
1/2 tsp. of white pepper
1/4 tsp. kosher salt
2 tsp. of dried Herbs de Provence
1 1/2 cups shredded Parmesan cheese
1 cup fresh chopped Italian basil

Directions


Spread baguette cubes out on a large baking sheet, drizzle with olive oil and toss together to fully coat, and bake at 400 degrees for about 5 minutes or so to toast.

In a skillet, melt the butter over medium heat and add the diced bacon. Cook until the bacon starts to brown, about 7 - 8 minutes. Once the bacon has started to brown, add the onion, cover, and cook until the onion is translucent and starts to brown. Add minced garlic and cook for about 1 min more until you can smell the garlic. Remove from heat.

Reduce heat on the oven to 325 degrees. Dice the heirloom tomatoes and put into a large bowl. Add the baguette croutons, bacon mixture, and the other dry spices to the bowl. Mix thoroughly. Coat a large casserole dish with cooking spray. Pour the tomato mixture into the casserole dish, cover evenly with the parmesan cheese, and bake for 50 minutes. Let cool for about 5 minutes. Mix in fresh basil before serving.

Makes 6 - 8 servings.

Wednesday, March 12, 2014

Recipe: Southern Corn Pudding

This is one of my favorite side dish recipes. It is put together easily like a casserole, but will come out with the consistency of a soufflé. In some parts of the south, it is made with a good bit more cornmeal and comes out a bit cakier - akin to British-style puddings. That version is commonly called "spoon bread" - more popular in the mid-Atlantic south. This version has a little more French Creole influence and is more popular in the deep south where I grew up. "Creamed corn" also derives from this dish.

Southern Corn Pudding


Ingredients


8 pieces of thick slab bacon, diced
1/2 of a large onion, diced
4 tbsp. unsalted butter (1/2 stick)
1 bunch of scallions, diced
6 cloves of garlic, minced
8 oz. of Gruyere cheese, grated
4 oz. of Parmesan cheese, grated
1 lg. package of frozen corn kernels (16 oz.), preferably sweet white corn
2 cans (12 oz. each) of yellow corn kernels, drained
1 cup heavy cream
2 cups whole milk
1/2 cup + 2 tbsp of all purpose flour
1/2 cup of sugar
4 tbsp corn meal
8 large eggs
1 tsp salt
1 tsp black pepper
1 tsp cracked red pepper

Directions


In a large skillet, cook the bacon in the unsalted butter over medium heat until the bacon begins to brown. Add the onion and cook until translucent and the bacon finishes browning. Remove from heat and set aside.

In a blender or large food processor, add the frozen corn, 1 cup of whole milk, and 1/2 cup of heavy cream. Blend at high speed until the mixture forms a creamy paste. Pour the mixture into a large mixing bowl, using a spatula to scrape out all of the corn mixture into the bowl.

Add all of the other ingredients to the mixing bowl, including the bacon and onion mixture cooked earlier (make sure all pan drippings go into the mixing bowl). Use a large whisk to mix all of the ingredients thoroughly, ensuring there are no lumps from the flour. Coat a large casserole dish with cooking spray and transfer the mixture from the bowl to the baking dish. Bake at 350 degrees for 50 - 55 minutes until the dish has risen about half an inch, is brown on top, and a knife inserted in the center comes out clean.

Makes 16 - 20 side dish servings.

Wednesday, March 5, 2014

Recipe: Cauliflower and Parsnip Gratin

This recipe is a fusion of knowledge and flavors from several southern casserole recipes that have been favorites in my family throughout my life with some classical French ingredients and technique. One of the things I've concentrated on over the past several years of cooking is technique - and that has led to great improvements in many of my recipes. This recipe is admittedly quite rich and is best served in as a side dish. As you can see, I served it recently with a grilled New York strip steak seasoned simply with salt and pepper.

Cauliflower and Parsnip Gratin


Ingredients


1 head of cauliflower, florets separated
3 large parsnips, peeled and cut into 3/4" chunks
1 1/2 cup of milk
2/3 cup of heavy cream
1/2 cup of dry white wine (Sauvignon Blanc or similar)
1 cup of grated gruyere cheese
2/3 cup of grated sharp cheddar cheese
1/2 cup of grated parmesan cheese
4 tbsp of unsalted butter
2 large shallots, minced
6 cloves of garlic, minced
2 tbsp Wondra flour (or well sifted all-purpose flour)
2 tsp white sugar
1 tsp of fresh lemon zest
1 tsp celery salt
1/2 tsp smoked paprika
1/2 tsp ground sage
1/2 tsp dried thyme
1/2 tsp cayenne pepper
1/2 tsp ground white pepper
1/2 tsp ground black pepper
1/4 tsp ground nutmeg
2 sleeves of Ritz crackers (or other butter crackers), crumbled (approx. 3 cups)

Directions


Preheat oven to 375 degrees. Coat a 9" x 13" casserole dish with cooking spray.

Fill a large pot 2/3 of the way with water and heat until boiling. Once boiling, reduce heat to medium. Add chopped parsnips. Simmer parsnips for 5 - 7 minutes. Add cauliflower and continue simmering for 4 - 5 minutes. Drain the vegetables in a colander and set aside.

In a medium saucepan over medium heat, melt the butter. Once the butter is fully melted, add the shallots. Cook the shallots until they begin to brown and are softened, stirring frequently (approximately 5 minutes). Stir in the garlic. Using a whisk, add the Wondra flour and mix into the butter, onion, garlic mixture until fully absorbed. Add 1/2 cup of the milk and the white wine. Whisk until any flour lumps disappear. Continue to whisk constantly for approximately 3 - 4 minutes. Add remaining milk and all of the heavy cream. Raise heat to medium high. Continue whisking fairly frequently until the mixture begins to bubble and simmer. Reduce heat to low and add all shredded cheeses, the sugar, lemon zest, and all dry spices. Continue to whisk until the mixture becomes smooth and all the cheese is melted and incorporated (approximately 6 minutes).

Cover the bottom of the casserole dish with 1/2 of the crumbled Ritz crackers. Put vegetables into the casserole dish and spread out into an even layer. Pour cheese sauce over all of the vegetables, coating evenly. Use the back of a spatula to smooth out the mixture as much as possible. Spread the remaining crumbled Ritz crackers all over the top. Place into the oven and bake for 35 minutes until the top crust has browned and the casserole is very bubbly. Take out of the oven and allow to rest for at least 5 minutes before serving.

Makes 16 - 20 servings as a side dish.

Tuesday, March 4, 2014

Prep Class: Béchamel Sauce (e.g. "Basic White Sauce")

Béchamel sauce is considered one of the "meres" ("mother sauces") in French cooking. It is a quite basic white sauce that can be extended to all sorts of purposes. One of those purposes, of course, is in the creation of a gratin. The history of béchamel is a bit debated, but it was most likely created by Chef Francois Pierre de la Varenne (1615-1678). He was a court chef during King Louis XIV's (1643-1715) reign, during the same time that powerful financier Marquis Louis de Béchamel was there in court. La Varenne wrote Le Cuisinier Francois ("The True French Cook"), which included Béchamel Sauce - the first known place the recipe was seen in print. It is thought that he dedicated it to Béchamel as a compliment. Before you can make a proper gratin, you should master the technique of creating béchamel sauce. The core of making a béchamel is to make a roux - which you should know how to do by now if you tried to make my gumbo :). The most basic version comes from the master herself - Ms. Julia Child. From this core sauce you can build many others - including the necessary one for building the gratin.

Monday, March 3, 2014

Prep Class: The Familiar - Gratin Dauphinois

Most of you are probably familiar with what we American's call "scalloped potatoes." The French name is "gratin dauphinois" and the origins of this dish can be traced back to French peasants in the 17th century. Original versions of the dish did not include cheese at all - as cheese was very expensive in the early part of the 17th century. As the dish evolved, the heavy cream sauce at the core of the dish evolved to include rich cheeses such as gruyere. In America, the same dish evolved further to use pasta instead of potatoes to become everyone's favorite "macaroni and cheese." And there can be some major, heated debates even within families - especially southern ones - about the right and wrong way to do this dish. Thomas Jefferson was one of the first major proponents of this dish in America - serving it at official functions as early as 1802. However, many other types of vegetable and meat fillings can be used at the core of a gratin. This is where I will focus in the first couple of recipes I share leading up to sharing my amazingly decadent "grown-up mac 'n cheese."

Saturday, March 1, 2014

Recipe: The Southern Fried Chicken Sandwich

I grew up with Chick-Fil-A. As a Georgia boy born and bred, they were everywhere growing up and admittedly I often get major cravings for their chicken sandwiches. Their controversial politics aside (which is why I can't in good conscience eat at their restaurants for now), I can't deny how good their food actually is. So, I decided to try and recreate it - and I admittedly achieved a recipe that I think might be a bit better than the original. But, you're welcome to be your own judge.

Southern Fried Chicken Sandwich


Ingredients


4 large boneless/skinless chicken breasts, sliced in half longways
Juice from one large container of dill pickles
1 quart chicken broth
2 tbsp Sriracha or Tabasco
1 tbsp peppercorns
1 tbsp whole cloves
1/4 cup + 2 tsp sugar
1/8 cup kosher salt
2 cups self-rising flour
3 eggs
1 1/2 cup buttermilk
1 1/2 tbsp. ground black pepper
2 tsp. paprika
1 1/2 tsp. cayenne pepper
1 1/2 tsp. ground white pepper
1/2 tsp. ground cumin
1/2 tsp. ground mustard
1/2 tsp. celery salt
Peanut or other high smoke point oil for frying
8 potato buns
Cooking spray
Dill pickle slices (optional)

Directions


Mix chicken broth, pickle juice, Sriracha, peppercorns, cloves, 1/4 cup of sugar, and 1/8 cup of kosher salt into a large sealable container. Poke chicken breasts liberally with a fork on all sides to create small holes to absorb brine. Add chicken breasts, making sure they are fully submerged, and seal. Brine at least 4 hours but preferably overnight.

Preheat oil to 350 degrees in a deep dutch oven or large pot. Mix together black pepper, paprika, cayenne pepper, white pepper, ground cumin, ground mustard, and celery salt. Whisk together eggs and buttermilk in a separate bowl. Mix 2 tsp of sugar into the flour in another bowl. Add 2 1/2 tablespoons of the spice mixture to the flour and mix in well. Add 4 tablespoons of the egg/milk mixture to the flour mixture and mix through with fork until the batter is coarse all around. Take chicken breasts out of the brine and pat dry with paper towels. Season all over with the remaining spice mixture, pressing the mixture into the chicken to coat well. Working one piece at a time, coat in the milk/egg mixture, allowing excess to drip off, then the flour/spice mixture. Shake off excess flour then submerge slowly into the hot oil, turning frequently. When dark brown, remove from oil and place on a rack to drain off excess oil. Spray the potato buns lightly with cooking spray or brush with melted butter and place on a griddle on medium heat to toast. Place 2 dill pickle slices on the toasted bun and then a piece of cooked chicken. Serve immediately.

Makes 8 servings.

Thursday, February 27, 2014

Recipe: Chinese "Red Cooking" Master Stock

As discussed in prior posts, I use this stock primarily to poach heartier whitefish such as halibut, cod, and sea bass, but, it can be used to poach chicken, duck, pork (lean or fattier cuts), and other types of seafood. The "red" color appears at the end of poaching. For fish, poaching time is approximately 8 - 10 minutes for filets that are 1/2 - 3/4 inch thick. For chicken, duck, or pork, poaching time should be at least 30 minutes - use an instant read thermometer to make sure the meat is cooked through. I usually serve over rice or Asian noodles such as udon or soba.

"Red Cooking" Master Stock


Ingredients


3/4 cup light soy sauce
2/3 cup dark soy sauce
1/3 cup fish sauce
1 cup Shao Xing cooking wine
2 tbsp. sesame oil
4 cups seafood stock (use vegetable stock if seafood stock is not available)
3 cups water
3/4 cup brown sugar
1 large onion, diced
Peel of 1 orange, coarsely chopped
1/8 cup of sliced fresh garlic
1/8 cup of fresh ginger slices
8 small Thai chiles, coarsely chopped (2 - 3 jalapenos if Thai chiles are not available)
3 cinnamon quills
5 star anise pods
2/3 cup unsalted roasted seaweed, coarsely chopped
1 tsp. canola or other neutral oil
1 bunch of scallions, diced (for garnish of final dishes)

Directions


Heat canola oil in large (3 qt.+) pot over medium-high heat. Add onions and chiles. Cook until onions become translucent and begin to brown. Add all other ingredients to the pot. Raise heat to high and heat until boiling, stirring frequently. Once boiling, reduce to very low simmer (low heat), and cover. Cook at low simmer for at least 90 minutes up to 2 hours, stirring every 10 - 15 minutes.

To poach, place seafood or meat into stock (in batches if necessary) and cover. Do not disturb until at least 8 minutes (for fish) and at least 25 - 30 minutes (for poultry and pork) to check for doneness.

Monday, February 24, 2014

Prep Class: Chinese Master Stock

Given I'm a West Coaster now, I've also adapted many different types of Asian cuisines into my cooking. The three that most often show up are Chinese, Japanese, and Thai. However, as is typical of a southern cook, all end up with a little bit of my own twist while staying true to their culinary and cultural roots. Last night, I hosted a dinner party for several friends. I made a fish dish which I have actually made very often which, at its core, uses a "master stock" derived from Chinese cooking traditions. Soon, I will reveal my recipe for this "master stock" which is quite easy to make (if you can acquire all the ingredients) and is suitable for poaching any kind of seafood or poultry and also works quite well as a stock for noodle soup (when properly diluted).

Friday, February 21, 2014

Recipe: Lowcountry Gumbo

This style of gumbo is definitely more Savannah/Charleston than the Louisiana styles most of y'all are probably used to. I was introduced to this style initially growing up at one of the many family reunions we'd attend. Family reunions in the south are big affairs: everyone shows up about mid-morning if it's on a Saturday, or just after church if it's on a Sunday, and brings whatever they had decided to cook that day. Big folding tables are set up out in the yard of whomever's house was the fortunate (or unfortunate ;)) one to be hosting - although sometimes we'd end up renting a public park or such. Then the dishes would just be scattered all over the tables - a cornucopia of roasted meats, fried things, stews, soups, vegetables, salads, casseroles. Gumbo of this style would be in a big pot, usually right next to another southern classic, Brunswick Stew (which I promise I'll share my recipe for soon). All of us kids would usually get first dibs at the tables. This was so we'd get all full of energy to run around and play for the rest of the afternoon while the adults sat around gossiping and telling stories.

I was re-introduced to this style of gumbo on a visit to Savannah about 15 years ago. Ever since, this style has stuck. I found the basics of a recipe in an old Edna Lewis cookbook with some cross-referencing to New Orleans Chef Paul Prudhomme's cookbook and fiddled with it until I got it to what I remembered. So, this is now how I make gumbo. Now, I admittedly don't always make it the same exact way every time - which is kinda the beauty of this dish. Sometimes I leave out the oysters or scallops because I can't find ones I like. Sometimes I add pulled chicken that I had leftover from earlier in the week. However, the recipe below is the one I most often use and matches closest to my memories. I hope y'all enjoy.
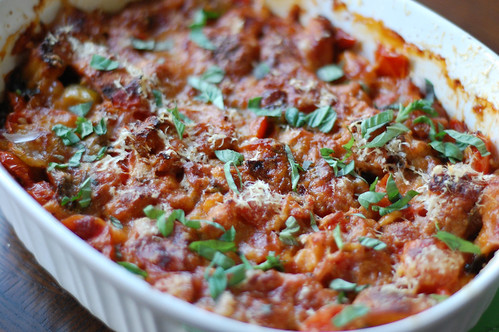
Lowcountry Gumbo

Ingredients

2 sticks of unsalted butter
1 1/4 cup of all-purpose flour
1 bottle of good dry white wine (Sauvignon Blanc or Pinot Grigio)
3 quarts of chicken stock
1 lb. of mild pork sausage, ground or diced
1 lb. of ham (off the bone preferred, but ham steaks are OK), diced
1 lb. shrimp, peeled, detailed, deveined, chopped
1 lb. scallops, chopped
1 lb. jumbo lump crab meat (if fresh is unavailable, a good refrigerated brand OK)
1 lb. mild whitefish filets (grouper, flounder, cod, halibut all acceptable), cut into small pieces
1/2 lb. oysters (this is weight after shucking - if fresh is unavailable, a good canned or refrigerated brand is OK), chopped
2 large red bell peppers, diced
1 large green bell pepper, diced
2 large sweet onions, diced
1 whole celery stalk (ribs removed), diced
6 large green heirloom tomatoes OR 10 green vine tomatoes, diced
1 small can (16 oz.) crushed red tomatoes
2 1/2 lbs. of frozen cut okra (usually 2 bags)
1 1/2 tbsp. celery salt
1 1/2 tbsp. cayenne pepper
1 1/2 tbsp. smoked paprika
1 tbsp. white pepper
1 tbsp. black pepper
1 tbsp. savory
1 tbsp. ground sage
1 tbsp. sugar
5 bay leaves
1 bunch of scallions, diced (for garnish)
6 cups of cooked long-grain white rice (because you can't have gumbo without rice :))

Directions

You will need a large 18 quart stockpot for this recipe. Over medium-high heat, add butter, sausage, and ham to pot. Cook until sausage is fully cooked and browning, stirring frequently with a big wooden flat spatula, approximately 10 minutes. Remove cooked sausage and ham with a slotted spoon to a separate plate or bowl leaving all rendered fat in the bottom of the stockpot. Now it's time to roux.

Keep heat at medium-high. Stir all of the flour into the fat. Using the spatula, keep stirring constantly at a slow, gentle pace until the roux reaches a medium brown (caramel) color. This can take anywhere from 10 - 15 minutes. Once you've hit color, immediately add back the pork, ham, chopped celery, onions, and bell peppers. Keep stirring until the vegetables start to sweat (about 4 - 5 minutes). Slowly add in 1/3 of the bottle of white wine at a time, stirring until fully incorporated. Now add all dry seasonings, the bay leaves, and frozen okra. Stir to incorporate. Now add all chicken stock. Bring to a boil, stirring occasionally, then reduce heat to a low simmer. Stir occasionally and deep into the pot (to prevent any sticking) about every 4 - 5 minutes.

After 45 minutes of cooking, use a spoon to test for seasoning - adjust if you'd like (if too spicy for you, add a little more sugar). Now add the green and canned crushed tomatoes to the pot. Continue cooking for an additional 30 minutes, stirring about every 4 to 5 minutes. Gumbo should reach a thickness somewhere in between a soup and a hearty stew. If it's not thick enough for you, whisk 1 to 2 tbsp. of cornstarch into some hot water to make a slurry then add to the pot to thicken things up.

Now add all of the diced and chopped seafood to the pot. Continue cooking for an additional 30 - 45 minutes. All seafood should be cooked through and the gumbo should now have a solid and good seafood-forward taste. Remove pot from heat.

Use a ladle to fill bowls approximate 3/4 of the way to the top. Add 1/4 to 1/3 cup of cooked white rice to the center. Sprinkle chopped scallions liberally over the top and serve.

(makes 16 - 24 servings.)

Wednesday, February 19, 2014

Prep Class: To Tomato or Not to Tomato?

There is a lot of debate amongst both my friends and the interwebs over one particular ingredient when it comes to making gumbo - tomatoes. Personally, I think that if the gumbo has okra in it that the tomato is needed for acid and sweetness balance - and sometimes I prefer to use all green heirloom tomatoes to even add a slight hint of bitter acid to the balance that goes into the gumbo. Battles have been fought and friends lost over this argument (see: A Short History of Gumbo). I don't even discuss the making of gumbo with one of my co-workers (from Louisiana) because I prefer tomatoes - and she has a religious objection to them in gumbo. I've gone both ways in the making of gumbo - but the recipe I intend to share admittedly makes use of the tomato. So, you can now have your own internal debate about whether you will leave it in or take it out - but just remember you aren't going to get the goodness my recipe intended if you leave it out... so, make your choice wisely :).

Tuesday, February 18, 2014

Prep Class: How To Make a Roux

In order to prepare y'all for my Savannah-style seafood gumbo recipe coming later this week, first you gotta learn how to roux. A good roux is the basis for almost all southern sauces, gravies, stews, and soups. And now for the tip - my recipe isn't going to take you all the way to the very dark roux typical of New Orleans cooking (because, well, I'm not from Louisiana)... so learn to stop at the medium caramel kind. More to come in the full recipe later.

Monday, February 17, 2014

Borrowed: Duck with Apple and Collards

I love duck and I grew up with Miss Dupree on PBS back home in Georgia. Glad to see she's still churning out great looking recipes. I'm gonna have to try this...

Duck with Apple and Collards